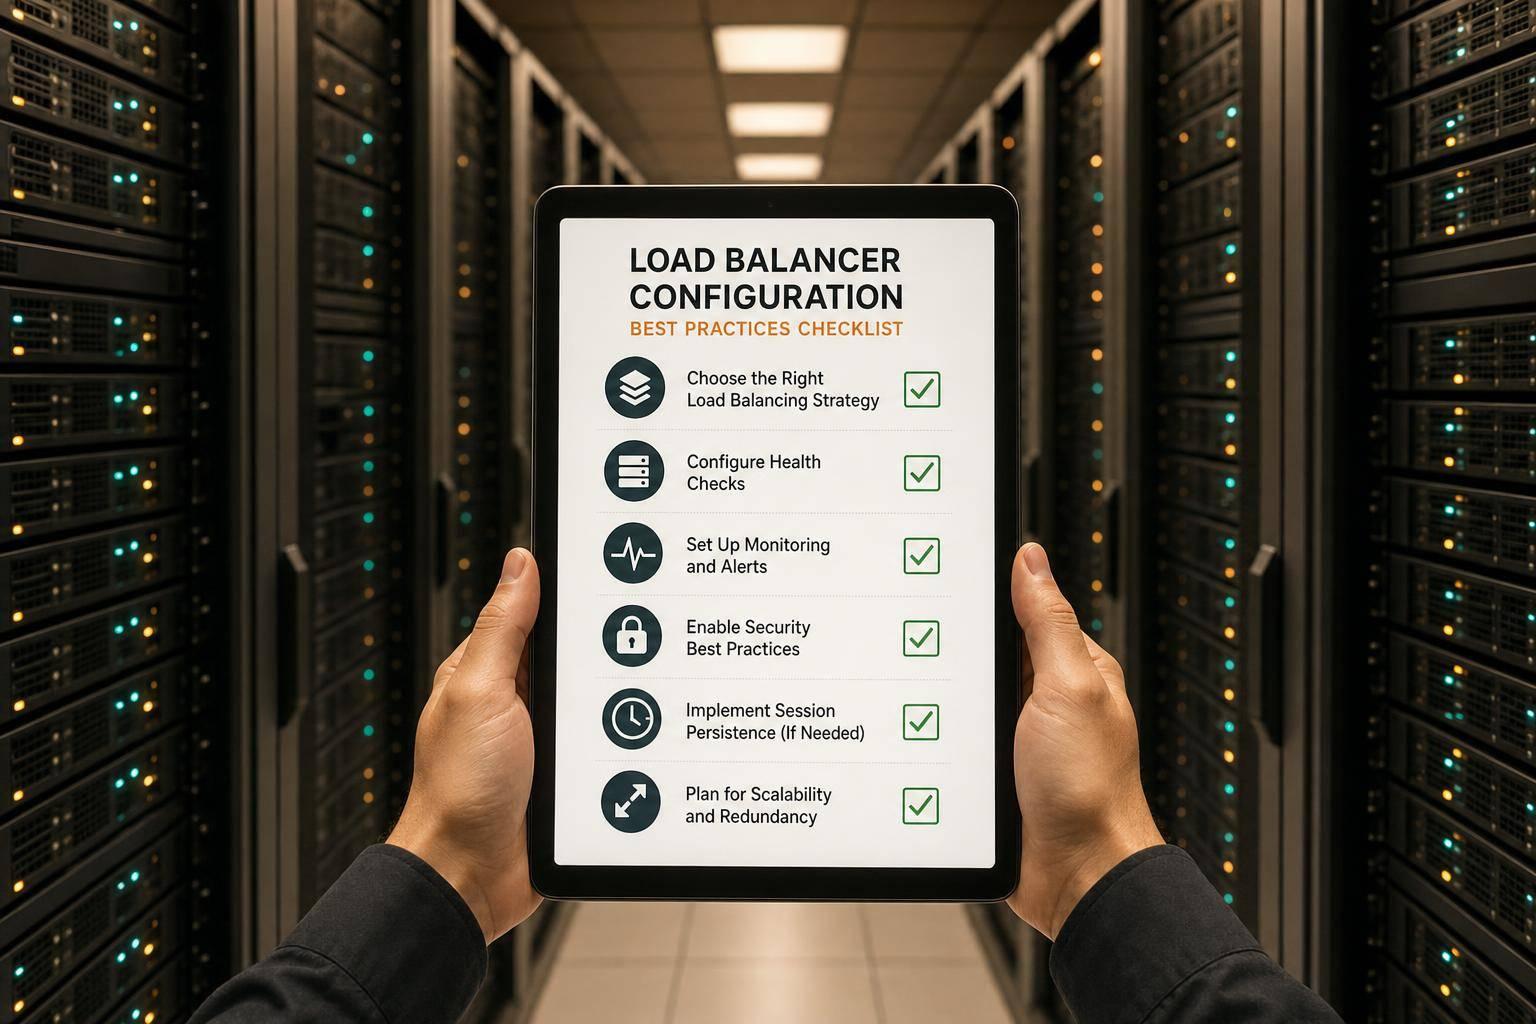
If I had to cut this checklist down to one page, I’d focus on eight checks: pick the right load balancer type, keep at least two backends across zones, open only the ports you need, map rules in the right order, match the balancing method to the workload, tune health checks for readiness not just process uptime, lock down TLS and admin access, and test failover before go-live.
In plain terms: a load balancer is only as good as its setup. A bad health probe, one backend in a pool, or a timeout mismatch can lead to 5xx errors, broken sessions, slow failover, and extra cloud spend. The article points to practical baselines such as 30–60 second API timeouts, a 10-second health check interval with a 5-second timeout, and testing at 1.5–2× expected peak traffic.
Here’s the short version of what I’d check:
- Scope and exposure: use Layer 7 for HTTP/HTTPS features and Layer 4 for TCP/UDP pass-through
- Resilience: avoid single-target pools and spread backends across availability zones
- Network rules: allow listener traffic, backend traffic, and health probes at security group, ACL, and host firewall level
- Routing: list every hostname, port, protocol, and path, then test rule order with
curl - Traffic sharing: use round robin for stateless apps, least connections for long-lived requests, and stickiness only when needed
- Timeouts and draining: line up keep-alives and set draining against p95 and p99 request times
- Health and failover: use
/readyfor traffic decisions and drill zone failover in a low-traffic window - Security: allow TLS 1.2/1.3 only, automate certificate renewal, enable WAF where needed, and lock management access to trusted networks
- Monitoring and testing: watch HealthyHostCount, UnhealthyHostCount, ActiveConnectionCount, latency, and load-balancer 5xx metrics, then retest after each major change
A quick comparison helps at the start because the first decision usually shapes the rest.
| Check area | What I’d confirm first | Why it matters |
|---|---|---|
| Load balancer type | Layer 4 vs Layer 7 | Wrong fit can block routing or TLS needs |
| Backend design | 2+ backends, multi-zone | One target means one failure can stop service |
| Traffic handling | Rule order, algorithm, stickiness | Poor mapping can send users to the wrong backend |
| Health and failover | Readiness checks, draining, zone failover | Bad settings can keep dead nodes in rotation |
| Security | TLS policy, WAF, admin lock-down | Open access or old protocols increase risk |
| Pre-live checks | Metrics, logs, load test, failover drill | Problems often show up here before users see them |
That’s the core of the article: keep the setup simple, test each path, and treat the checklist as a baseline you review after changes and incidents.
::: @figure 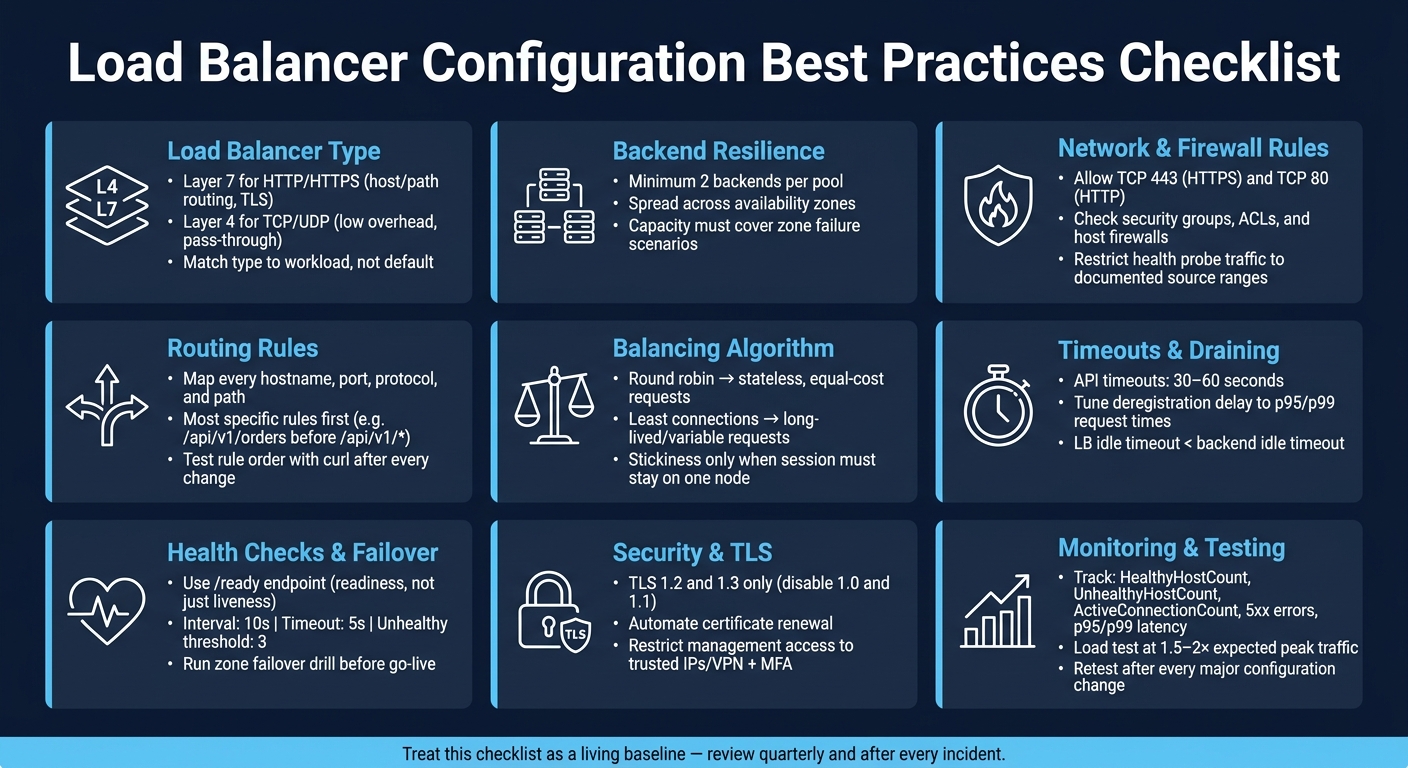 {Load Balancer Configuration Checklist: 9 Critical Check Areas}
:::
{Load Balancer Configuration Checklist: 9 Critical Check Areas}
:::
What is a load balancer and how to set it up
Checklist: scope, backend design, and network prerequisites
Start with three basics: load balancer type, backend resilience, and network paths for traffic and health checks. Get any of these wrong and the rest can fall apart fast. A poor exposure model or a blocked probe port can undo every setting that comes after it.
First, pick the right load balancer type and exposure model.
Choose the load balancer type and exposure model
Use Layer 7 for HTTP/HTTPS and Layer 4 for TCP/UDP. Use both only if you need separate entry points.
Choose Layer 7 when you need HTTP/HTTPS features like host or path routing, TLS termination, and protocol-aware behaviour such as session persistence, WebSocket, gRPC, and HTTP/2. Use a Layer 4 (network) load balancer for TCP/UDP workloads when you want low overhead, high connection throughput, or pass-through behaviour.
| Requirement | Layer 4 (Network) | Layer 7 (Application) |
|---|---|---|
| HTTP path or host routing | ✗ | ✓ |
| TLS termination | ✗ | ✓ |
| Header-based routing | ✗ | ✓ |
| TCP/UDP pass-through | ✓ | ✗ |
Once you've settled on the layer, define the exposure model in plain terms.
- Use public exposure for internet-facing services
- Use private exposure for internal-only workloads
- Use hybrid when a service needs both internal and external entry points
Keep internal services off the public internet. If a service needs both internal and external access, split them across separate frontends instead of forcing both jobs through one endpoint. For multi-region services, decide on geo-routing or active-passive failover before go-live.
Confirm backend pool size and resilience
A pool with one target is a single point of failure. Use at least two backends per pool, spread across availability zones.[1][3][4][5]
Capacity planning needs to cover failure cases, not just day-to-day load. Check whether the remaining instances can take full production traffic if one zone or one instance drops out. That’s the bit teams often miss.
For autoscaling groups, make sure the scaling policy spans multiple availability zones and that the minimum healthy percentage is set high enough to avoid availability gaps during instance replacement.[2] Also check instance warm-up time. If a new backend needs several minutes before it’s ready, the autoscaling policy should allow for that delay before sending traffic to it.
Allow the right firewall and health probe traffic
Allow the listener ports - usually TCP 443 for HTTPS and TCP 80 for HTTP redirects. Then check that outbound rules let the load balancer talk to each backend on the right application port.
You need to check all three layers:
- Security groups
- Network ACLs
- Host firewalls
Any one of them can block traffic without making much noise.
Health probe traffic needs its own rules. Allow only the documented probe source ranges for your platform, and lock them to the exact ports and protocols used by health checks. Keep those rules tight. Use a dedicated health endpoint such as /healthz instead of probing the main application port.
With scope, backend reachability, and health probes sorted, the next step is routing and session handling.
Checklist: traffic distribution and session handling
With backend pools confirmed and network paths open, the next step is routing, balancing, and timeout alignment. If those pieces are off, traffic can drift to the wrong place or sessions can break at awkward moments.
Map listeners and forwarding rules correctly
Start with listener mapping. Everything else hangs off it.
Write down every entry point before you set any rules: hostname, port, protocol, and path, along with the backend pool it should reach. Then give each one a named listener and forwarding rule. It also helps to set a default 404 or another safe fallback for traffic that doesn't match anything.
Rule order matters more than people think. Put the most specific matches first, then work back to the broad ones. So /api/v1/orders should be checked before /api/v1/*, and /api/v1/* should come before /api/*. Get that order wrong and requests can land in the wrong backend without much warning.
Also check your HTTP and HTTPS setup. HTTP on port 80 should either redirect to HTTPS on port 443 with a 301 or 302, or be turned off if you don't need it. One small gotcha: path rules only look at the path. Query strings are ignored.
After any rule update, don't wait for a full rollout to test it. A quick curl against a few sample paths is often the fastest way to see whether routing still behaves as expected.
Select the right balancing algorithm for the workload
Pick the balancing method based on how the workload behaves, not what happens to be the default. Here's the short version.
| Algorithm | Best use case | Trade-offs |
|---|---|---|
| Round robin | Stateless services with similar request cost and backend capacity | Does not react to slow or overloaded nodes |
| Least connections | Long-lived or variable-duration requests (e.g. WebSockets, file uploads) | Requires accurate connection tracking; sensitive to short bursts |
| Source-IP hash or consistent hashing | Session affinity without external state; sharded in-memory caches | Uneven load if users share IPs; key movement on scaling events is reduced, not eliminated |
| Weighted round robin or weighted least connections | Heterogeneous backends with different capacity | Requires accurate weighting and upkeep |
As a rule, stateless services are easier to run and scale. Use stickiness only when a session has to stay on one node. Session affinity, whether it comes from cookies, source IP, or consistent hashing, can help cache locality and in-memory state access. But there's a catch: it also piles more risk onto fewer nodes.
If stickiness is needed, use load-balancer-injected cookies or consistent hashing based on a stable identifier.
Align timeouts, keep-alives, and connection draining
Check keep-alive and timeout values across the full path: client, load balancer, proxy, and backend. Look at them together, not one by one. The load balancer idle timeout should be lower than the backend's idle timeout, so the load balancer closes idle connections first.
For most APIs and web applications, 30–60 seconds fits most use cases. [6][7][8] WebSocket and streaming endpoints are a different story. They usually need separate listeners with longer timeouts, or at least timeout rules set with more care.
Connection draining, sometimes called deregistration delay, gives in-flight requests time to finish during deploys, scale-in events, and maintenance. In AWS ALB and NLB target groups, the default deregistration delay is 300 seconds, and you can set it from 0 to 3,600 seconds. [9][10][11]
That default can miss in both directions. For fast APIs, 300 seconds is often too long. For workloads with long-running requests, like file uploads or report generation, it may be too short. A better approach is to tune the setting against observed p95 and p99 request times instead of leaving every service on the same value.
While draining is in use, watch active connection counts and error rates. That's the quickest way to see whether it works the way you expect before live traffic depends on it.
Verify these values before production traffic reaches the pool.
Checklist: health checks, failover, and security controls
Tune health checks for fast, low-noise failure detection
Check whether the service is ready to handle traffic, not just whether the process is still running. Use a readiness endpoint such as /ready to decide where traffic should go, and keep liveness checks for restart logic. In plain terms, a health check should prove that the backend can actually serve requests.
How fast a node is removed from rotation comes down to the interval, timeout, and unhealthy threshold. For many HTTP APIs, a good starting point is a 10-second interval, a 5-second timeout, and an unhealthy threshold of 3 [12][13]. Set the healthy threshold higher than the unhealthy threshold so a brief blip doesn’t send the service in and out of rotation.
For stateful workloads, split liveness and readiness checks. Liveness decides whether the process needs a restart. Readiness decides whether it should receive traffic. That split helps with graceful draining during deployments without kicking off a full restart cycle.
Use those same thresholds to manage draining and when a node comes back into rotation.
Set failover behaviour and maintenance handling
Once health checks are in good shape, decide how nodes leave rotation during deployments and zone failures. Then set how the load balancer deals with failure, maintenance, and re-entry. Draining, health checks, and shutdown timing need to line up.
During rolling deployments, mark instances as draining before you stop them. New connections move elsewhere, while existing ones are allowed to finish. The draining timeout should be close to the service’s usual maximum request time, not just whatever default happened to be there.
For zone-level incidents, enable cross-zone load balancing where it makes sense, and make sure each zone has enough spare capacity to take traffic from a failed zone. Don’t assume this will work on the day. Run a failover drill in a low-traffic window and confirm that traffic shifts cleanly without swamping the remaining zones. For planned maintenance, use health checks to take nodes in and out of rotation on their own, backed by runbooks that set out the expected sequence of events.
Apply TLS, access restrictions, and exposure controls
Once traffic handling is steady, tighten TLS and access paths. Use a managed TLS policy and automate certificate renewal. Disable TLS 1.0 and 1.1. Support TLS 1.2 and 1.3 only, with forward-secrecy cipher suites [14][15][16]. That lines up with guidance from the UK’s National Cyber Security Centre.
If the setup handles personal data under UK GDPR or payment data under PCI DSS, end-to-end encryption is usually required [17]. Management access should be limited to trusted IP ranges or VPN only. Apply role-based access control and multi-factor authentication to the management plane, and log every administrative action.
| Control | Purpose | Verification method |
|---|---|---|
| TLS 1.2/1.3 only | Block weak protocols | Run an external TLS scanner; confirm no TLS 1.0/1.1 or SSLv3 is offered |
| Forward secrecy cipher suites | Preserve forward secrecy | Audit listener cipher configuration; reject RSA key-exchange suites |
| Automated certificate renewal | Avoid certificate expiry | Confirm renewal automation is active; check certificate expiry dates |
| End-to-end encryption | Encrypt backend traffic | Verify backend listeners use TLS; check internal CA trust configuration |
| WAF enabled | Block common web attacks | Attempt a blocked payload such as SQLi and confirm a 403 response |
| Management access restricted | Restrict admin access | Attempt access from an external network and confirm access is denied |
| Health probe path functional | Confirm app health, not just port availability | Verify the probe hits /ready; review probe response codes |
| Audit logging active | Support audits and response | Confirm logs are forwarded to a centralised logging service or SIEM |
Checklist: monitor, test, and review before production
Track the metrics and logs that reveal misconfiguration
Once configuration and failover controls are in place, make sure your observability setup can flag misrouting, saturation, and TLS problems before users notice anything is wrong. Keep an eye on backend health, error rates, latency, saturation, TLS failures, connection counts, and request patterns.[19][20][22][23]
Don’t lean on averages here. Use p95 and p99 latency to spot tail latency that averages tend to hide. Put those next to HealthyHostCount, UnhealthyHostCount, ActiveConnectionCount, and load-balancer-generated 5xx metrics so you can catch saturation or routing mistakes early.[19][20][22]
Metrics tell you that something is off. Logs usually tell you why. Access logs, connection logs, and health check logs give you request-level detail that metrics alone can’t show, which makes root-cause diagnosis much easier.[23]
Alerts should map to user harm and money at risk, not just system noise. If HTTP 502s jump on /checkout, p95 latency climbs, and completed transactions fall at the same time, that’s not just an ops issue. It’s a revenue issue. Set alert thresholds around user and revenue impact.[18][22]
Validate under load and after every major change
Use those monitoring signals to shape your test scenarios and pass/fail thresholds. Monitoring shows what is happening in the system. Load testing shows how that system behaves when pressure builds. Stick with production traffic mixes rather than flat synthetic traffic, because neat lab traffic rarely behaves like real users do.[18][21][23]
Test at 1.5-2× your expected peak requests per second. That gives you enough headroom to check scaling rules and connection draining under stress, not just when conditions are still comfortable.[18][21][23]
Before go-live, run a failover drill and record the time from fault injection to stable recovery. Then do it again after every major configuration change, such as:
- a new listener
- a routing rule update
- a TLS policy change
Compare recovery times across runs so regressions are easy to spot instead of slipping through unnoticed.[18][21]
Conclusion: use the checklist as an ongoing baseline
Monitoring and testing close the loop on every configuration choice. Treat this checklist as a living baseline: review it quarterly, update it after incidents, and automate the key controls in CI/CD.
FAQs
How do I choose between Layer 4 and Layer 7?
Choose Layer 4 when you want fast, lightweight load balancing based on TCP/UDP ports and IP addresses. It puts less strain on the CPU.
Choose Layer 7 when you need application-level routing or security by checking HTTP headers, URLs, cookies or gRPC methods. It supports path-based, canary and A/B routing, but it uses more CPU and adds more latency.
A lot of systems use both: Layer 4 first, then Layer 7.
What health check settings should I start with?
Start with application-level health checks that test whether the service actually works, not just whether the process is running. Endpoints like /health or /healthz are a good fit here. Use sensible intervals and timeouts so checks are frequent enough to spot trouble, but not so aggressive that they add noise.
Pair those checks with load balancer health checks. That way, traffic goes ONLY to instances that are in good shape.
Health checks also need to be distributed, so they reflect things like CPU and memory pressure across the pool. If a node is struggling, take it out of rotation. Circuit breakers help here too. They stop a bad instance from dragging down everything around it.
When failures or overload hit, return HTTP 503. That tells the load balancer the instance is degraded and should be removed promptly.
How often should I retest load balancer failover?
Retest load balancer failover on a regular basis as part of your reliability checklist. That routine matters because failover tests can expose hidden weak spots before they turn into live incidents.
Use automated health checks at short, regular intervals so failures are spotted continuously. Then pair those checks with planned failover tests during non-production change windows to confirm the system switches to healthy targets when it needs to.