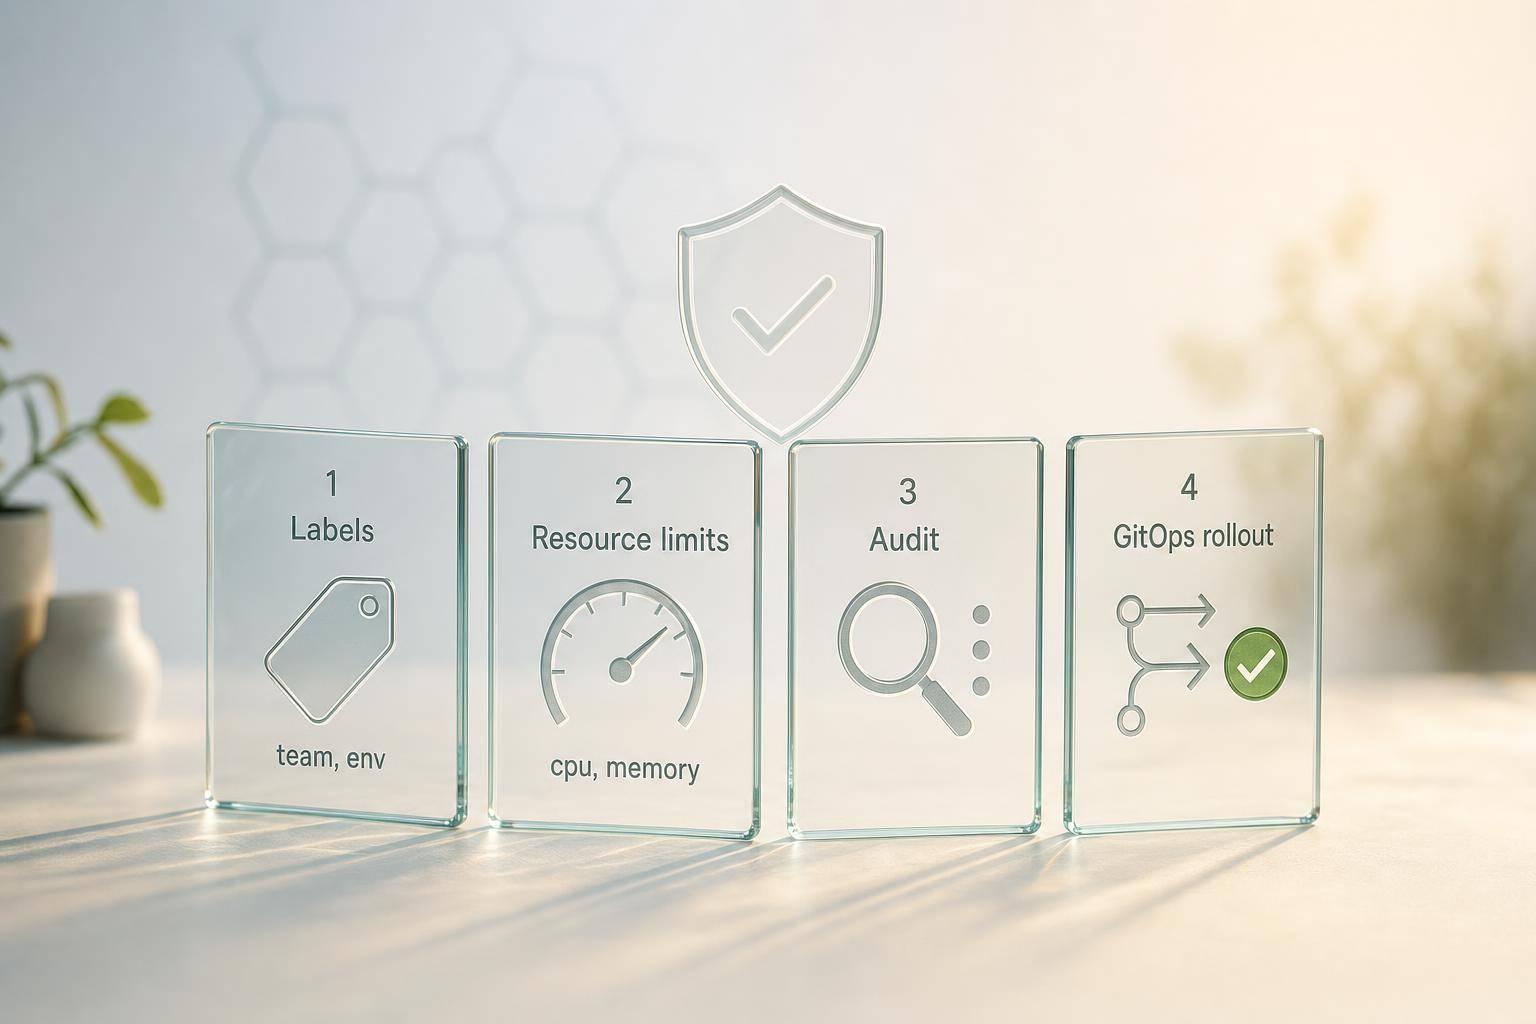
If I want fewer Kubernetes mistakes, cleaner compliance checks, and tighter control over cloud spend, Gatekeeper is one of the first tools I’d look at. It checks Kubernetes requests before resources are created, so I can block pods with missing labels, no resource limits, or settings I do not allow.
In plain English, this article shows me how to use Gatekeeper to:
- stop bad configs at admission time
- enforce labels such as
owner,cost-centre, andenvironment - require CPU and memory requests and limits
- scope rules by namespace, team, or production status
- test policies safely with
dryrun, then move towarnanddeny - run policy as code through Git and GitOps tools such as Argo CD or Flux
- size Gatekeeper for production with multiple replicas, audit tuning, and node separation
A few facts stand out. Gatekeeper needs Kubernetes v1.16+. A common starting point is 3 replicas for the controller manager and an audit interval of 300 seconds. The sample production sizing in the article starts at 100m CPU / 256Mi memory request for the controller-manager, with limits of 1,000m CPU / 512Mi memory. Those numbers help keep policy checks steady as cluster traffic grows.
What I like here is that the setup is split into two parts: templates define rules, and constraints decide where those rules apply. So I can keep shared policy logic central, while still applying different rules to dev, test, and production.
A short way to read the whole piece is this:
- Install Gatekeeper
- Check the webhook, CRDs, and audit pod
- Create templates and constraints
- Test fail and pass cases
- Start in audit mode
- Move to enforcement in stages
- Store everything in Git
For UK teams, that links policy work to two day-to-day concerns: governance and £ cost control. If every workload has the right labels and sane resource settings, chargeback gets easier, audits get cleaner, and waste from oversized workloads is easier to cut.
So if I had to sum the article up in one line, it would be this: use Gatekeeper to turn Kubernetes rules into repeatable checks that run automatically before mistakes hit the cluster.
Prepare the cluster and install OPA Gatekeeper
Prerequisites and cluster checks
Start in a non-production namespace. A dedicated test namespace such as gatekeeper-lab or policy-sandbox gives you room to test policies against non-critical workloads before you touch anything that matters.[5][7]
Gatekeeper needs Kubernetes v1.16 or later. You’ll also need kubectl set up for the target cluster, plus cluster-admin access or delegated permission to create cluster-scoped resources like ClusterRole, ClusterRoleBinding, CRDs, and a ValidatingWebhookConfiguration.[4]
Run these checks first:
kubectl cluster-info
kubectl auth can-i '*' '*' --all-namespaces
If the second command returns yes, you have the access you need.
Install Gatekeeper with manifests or Helm
You’ve got two simple install paths. The manifest route is the fastest if you’re testing or working with a smaller cluster:
kubectl apply -f https://raw.githubusercontent.com/open-policy-agent/gatekeeper/vX.Y.Z/deploy/gatekeeper.yaml
That installs Gatekeeper into gatekeeper-system.[5][6][7][9]
Helm is a better fit when you want version pinning and repeatable upgrades across environments.[6][7][8] Add the repo, then install:
helm repo add gatekeeper https://open-policy-agent.github.io/gatekeeper/charts
helm repo update
helm install gatekeeper gatekeeper/gatekeeper \
  --namespace gatekeeper-system \
  --create-namespace \
  --set replicas=3 \
  --set auditInterval=300 \
  --set constraintViolationsLimit=100
Three controller-manager replicas give you basic high availability. An auditInterval of 300 seconds is a sensible place to start for most production clusters. If your setup is smaller or changes more often, 60 seconds may suit you better for near real-time visibility.[5][7][8]
Start with these production values:[3]
| Component | CPU Request | CPU Limit | Memory Request | Memory Limit |
|---|---|---|---|---|
| Controller-manager | 100m | 1,000m | 256Mi | 512Mi |
| Audit pod | 100m | 500m | 128Mi | 256Mi |
Pick the install method that matches your change-control process, then check the webhook before you move on to policy work.
Verify that admission control and audit are working
Once the install finishes, make sure the system is healthy before you start writing policies. First, check that all pods in gatekeeper-system are up:
kubectl get pods -n gatekeeper-system
kubectl -n gatekeeper-system rollout status deploy/gatekeeper-controller-manager
Next, confirm that the main CRDs exist:
kubectl get crds | grep gatekeeper
You should see entries for constrainttemplates and constraints.
Then make sure the webhook is registered with the API server:
kubectl get validatingwebhookconfigurations
Check that gatekeeper-validating-webhook-configuration points to the gatekeeper-system service and has valid TLS.[7][9]
Here’s the quick check list:
| What to check | Command | Expected result |
|---|---|---|
| Controller pods running | kubectl get pods -n gatekeeper-system |
All pods show Running
|
| CRDs installed | `kubectl get crds \ | grep gatekeeper` |
| Webhook registered | kubectl get validatingwebhookconfigurations |
gatekeeper-validating-webhook-configuration exists |
| Audit pod active | Check audit pod logs | Completed audit cycles visible in logs |
Next, define your first ConstraintTemplate and Constraint.
Need help optimizing your cloud costs?
Get expert advice on how to reduce your cloud expenses without sacrificing performance.
Create policies with ConstraintTemplates and Constraints
How ConstraintTemplates and Constraints work together
With Gatekeeper installed and healthy, you can define your first reusable policy.
A ConstraintTemplate sets the rule. A Constraint applies it. The template creates the CRD, and enforcement begins when you create a matching Constraint.[26][9]
The main fields in a ConstraintTemplate are:
-
spec.crd.spec.names.kind: the name of the new constraint kind, such asK8sRequiredLabels -
spec.crd.spec.validation.openAPIV3Schema: the schema for theConstraintparameters -
spec.targets: where the policy logic lives
A Constraint then refers to that kind and adds spec.parameters with the actual values, plus spec.match to define which resources it covers.[10][24][25]
That split is what makes Gatekeeper reusable. A platform team can look after a small set of approved templates, while app teams and governance teams only change parameters and match scope. In plain terms, the risky bit stays central, and the day-to-day tuning stays simple.
| Approach | Complexity | Flexibility | Maintenance | Best fit |
|---|---|---|---|---|
Built-in library templates (e.g. K8sRequiredLabels, K8sContainerLimits) |
Low - no Rego needed | Moderate - covers common policies | Low - maintained by the Gatekeeper project | Quick wins: cost labels, resource limits, basic security |
| Custom ConstraintTemplates | Higher - requires Rego knowledge | High - any condition, any field | Higher - must be versioned and tested internally | Sector-specific rules and bespoke governance requirements |
Start with built-in templates, then add custom templates when internal policy needs closer control.[20][22][23]
Build a first policy for labels or resource limits
A good place to start is ownership and cost-allocation labels on Namespaces or Pods. If labelling is patchy, chargeback and FinOps reporting fall apart.[16][17][18]
Using the built-in K8sRequiredLabels template, the Constraint YAML looks like this:[13][10]
apiVersion: constraints.gatekeeper.sh/v1beta1
kind: K8sRequiredLabels
metadata:
  name: ns-must-have-cost-labels
spec:
  match:
    kinds:
      - apiGroups: [""]
        kinds: ["Namespace"]
  parameters:
    labels: ["owner", "cost-centre", "environment"]
The fields doing most of the work here are spec.match.kinds, spec.match.namespaces or namespaceSelector if you want a narrower scope, and spec.parameters.labels. If a user tries to create a Namespace without those labels, Gatekeeper returns a denial message that lists what is missing.[10][9]
For resource limits, the K8sContainerLimits template works in much the same way. You apply it to production namespaces and set parameters.cpu and parameters.memory ranges in Kubernetes units such as millicores, Mi and Gi. The template checks input.review.object.spec.containers and makes sure resources.requests and resources.limits exist and sit within the allowed bounds. That stops Pods from asking for unbounded resources and pushing up monthly cloud spend.[15][19]
Scope policies to teams, namespaces and environments
The spec.match block controls where a policy applies. On shared clusters used by several teams or business units, that matters a lot. Namespace labels are a simple way to split by team, environment, and risk level. The most useful controls are namespaces for a set list such as ["prod", "staging"], namespaceSelector for namespaces with a label like environment=production, and labelSelector on target objects so only workloads marked tier=critical face stricter rules.[10][21]
A common pattern for a UK SaaS or e-commerce platform is to label every namespace with team and environment, then create separate Constraints that match environment=production for resource limits and other governance policies. Development namespaces, by contrast, only need the basic ownership labels.[13][1][14]
That approach keeps production governance tight without bogging down day-to-day engineering work.
For multi-tenant clusters, a central platform or SRE team usually manages the templates and baseline Constraints, while product teams work inside those guardrails. Store all ConstraintTemplates and Constraints in Git with code review and automated tests so you have a clear audit trail.[13][1][14]
Next, test allow and deny behaviour with sample workloads before switching from audit to enforcement.
Secure Your Kubernetes Clusters with OPA Gatekeeper: Policy and Governance for K8s
Apply, test and automate policy enforcement
::: @figure 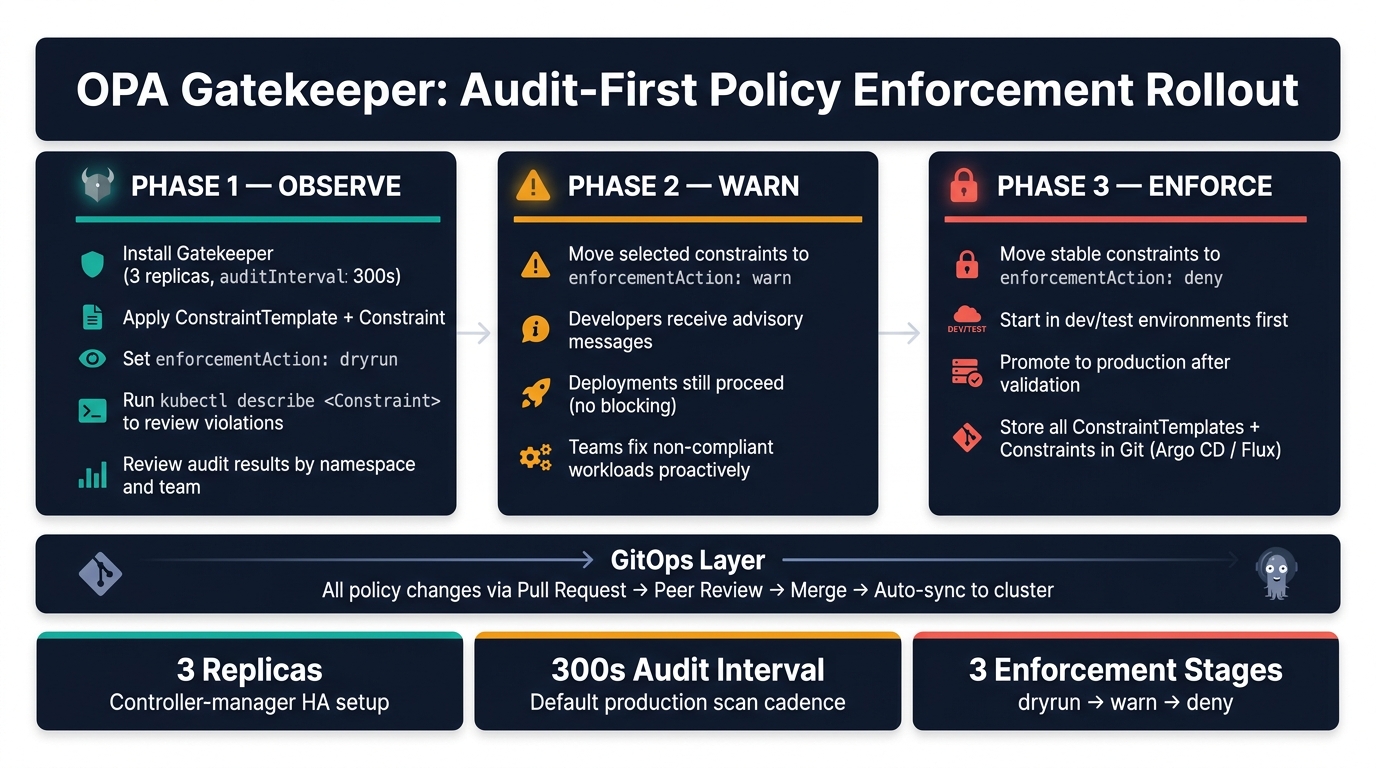 {OPA Gatekeeper Policy Rollout: From Install to Production Enforcement}
:::
{OPA Gatekeeper Policy Rollout: From Install to Production Enforcement}
:::
Once you’ve set the scope, test the policy against a real manifest before you switch it on.
Test deny and allow behaviour with sample workloads
Apply the ConstraintTemplate first, then wait for the CRD to register. After that, apply the Constraint.
When both are live, deploy a workload that breaks the rule on purpose. A simple example is a Pod that does not include the team_id label your policy expects. Run kubectl apply -f bad-pod.yaml and you should see something like this:
Error from server (Forbidden): admission webhook "validation.gatekeeper.sh" denied the request: [teamid-pods] The team_id label is required
The request is denied because team_id is missing. Add the label, apply the manifest again, and the workload should be admitted. That quick before-and-after check shows both sides of the policy: block when the rule is broken, allow when it’s fixed.[2][29]
Start with audit mode before enforcing policies
After that first check works, put new constraints into dryrun mode and review the next audit cycle. Gatekeeper’s audit controller scans resources that already exist and writes any violations to the constraint’s status, without blocking deployments.[32][11]
Set enforcementAction: dryrun on new constraints, then wait for the next audit cycle to finish. Next, run kubectl describe <constraint> to inspect violation counts and see which resources are affected, broken down by namespace and team.[32]
For many UK organisations with large legacy estates, a phased rollout is the safest route:
- Observe - run constraints in
dryrunmode and review audit results by team and namespace. - Warn - move selected constraints to
warnso developers get advisory messages while deployments still go through. - Enforce - move stable constraints to
deny, starting in lower-risk environments such as dev and test before production.[11]
This helps avoid surprise deployment failures and gives application teams time to fix issues before the policy starts blocking changes.
Once that rollout pattern is settled, treat policy as code.
Manage policies through GitOps and change control
Use kubectl for local testing, not day-to-day management. Keep Gatekeeper artefacts in Git, usually in paths like policies/gatekeeper/constrainttemplates/ and policies/gatekeeper/constraints/, split by environment, then sync them with Argo CD or Flux.[27][28]
Each policy change should go through a pull request. Review it with platform, security and app teams, then apply it when the change is merged. Git history gives you a clear record of who changed what and when, which helps with audit needs in regulated settings, including those aligned with ISO 27001.[30][31]
| Feature | Direct kubectl Management |
GitOps-Based Management |
|---|---|---|
| Change control | Manual, ad hoc and prone to human error | PR-based with peer review and approval |
| Auditability | Limited to cluster logs | Full history in Git, including authorship and timestamps |
| Rollback | Manual re-application of previous manifests | Revert a commit and reconcile |
| Consistency across clusters | Higher risk of configuration drift | Automated sync keeps clusters aligned with Git |
| Suitability | Best for local testing or development | Better suited to regulated UK production environments |
If you want fast feedback without losing traceability, add opa test or containerised validation to the CI pipeline. That way, invalid Rego can be caught before it ever reaches the cluster.
Running Gatekeeper in production and next steps
Run Gatekeeper safely at scale
Once your policies are defined and tested, the job changes. Now it's about scale, isolation, and day-to-day review.
Run multiple controller replicas on dedicated nodes, and set CPU and memory reservations so admission latency stays steady when traffic climbs. Give Gatekeeper its own node pool too. That way, policy checks aren't fighting with app workloads when the cluster gets busy.
At scale, two settings matter most:
- Set a longer audit interval in large clusters so audit cycles don't overlap.
- Use
--audit-match-kind-onlyto limit scans to the resource kinds your constraints actually target.[12][33]
It also helps to keep your policy set in two clear layers. One layer covers baseline cluster-wide rules, such as privileged pod restrictions, required cost-centre labels, and network policy checks, managed by the platform team. The other covers team-specific constraints scoped to individual namespaces.
Review both layers on a regular basis with platform, security, and finance teams. That's the simplest way to make sure production policies still match your risk appetite and any UK compliance duties that may have shifted over time.
Use policy automation to support cost and compliance goals
This model works best when policies map cleanly to spend and compliance outcomes.
One of the clearest ways Gatekeeper helps cut cloud spend is by enforcing resource requests and limits on every Deployment and StatefulSet. When those values are applied in a consistent way, cluster autoscaling can make better decisions, wasted node capacity falls, and monthly bills in £ across AWS, Azure, or GCP are closer to actual usage instead of padded headroom.
Add required labels like cost-centre, environment, and owner, and cost-allocation tools can tie spend back to the right UK business units. That's where policy stops being just a security control and starts doing useful business work too.
On the compliance side, Gatekeeper policies written as ConstraintTemplates and Constraints are version-controlled, peer-reviewed, and auditable. That fits well with UK GDPR duties and internal audit needs in sectors like financial services and healthcare. Audit mode also produces violation reports that can feed straight into risk registers or compliance dashboards, so security and data-protection teams can see drift clearly without adding separate tooling.
Conclusion: Key takeaways for a production rollout
A production rollout comes down to resilient sizing, clear policy layers, audit-first enforcement, Git-based change control, and regular technical and business review.
FAQs
How do I write my first custom Gatekeeper policy?
Start by defining your policy logic in Rego around a clear governance or compliance rule, such as required namespace labels or blocking containers that run as root.
Then wrap that logic in a ConstraintTemplate and apply it with a Constraint to the Kubernetes objects you want to check. Keep your policies in Git so they can be reviewed and tested automatically before deployment.
Hokstad Consulting can help turn complex regulatory requirements into practical custom Rego policies.
What can break if I enforce Gatekeeper too early?
Turning on OPA Gatekeeper in deny mode too early can throw a spanner in the works for both development and live deployments. It may block critical resources before teams have had time to adjust to the new rules.
If you skip testing, valid services can fail to deploy and trigger unplanned downtime. Starting in warn or audit mode gives teams room to spot violations and fine-tune configurations without bringing production to a halt.
How should I organise Gatekeeper policies in Git?
Treat your Git repository as the single source of truth for infrastructure and policy code. Keep your Rego policies, constraint templates, and Kubernetes manifests in the same place. Then use separate JSON files to set policy parameters for development, staging, and production.
This setup keeps things tidy. More to the point, it makes changes easier to track and far less messy when teams work across more than one environment.
Use a GitOps workflow with Argo CD or Flux to keep clusters in step with the repository. Every policy change should go through a pull request, so peers can review it and you have a clear audit trail.
That way, the repo isn’t just where files live. It becomes the place your team checks first when they need to see what changed, why it changed, and who signed it off.